Guys… THIS IS OUR FIRST EVER ICE CREAM RECIPE! It’s time for a celebration! AN ICE CREAM CELEBRATION.
Before I get ahead of myself, let’s talk nerd stuff before getting straight to the recipe. If you don’t like food science and knowing why you do things then you can skip this part but… I think you know better than that. Ice cream is a hard confection to nail, as it takes the perfect amount of fat, the right kind of sweetener, and a few other tricks to achieve the perfect consistency.

Let’s start off by talking about fat – I know, the word is like a taboo at this point, but if we’re going to make good ice cream, we’re going to have to get over that word. Ice cream needs fat because it doesn’t freeze like water does, which means the more fat there is, the less chunky ice crystals we’ll have, and the whole goal of making ice cream is to ensure there’s as few ice crystals as possible. Thus, the more fat in our base liquid – coconut milk in this case – the smoother our ice cream will be. On top of that, fat also creates a velvety mouth feel and carries other flavors wonderfully, as many spices and flavorings are fat soluble.
Because we’re working in the vegan world, where heavy whipping cream doesn’t exist, we have to find another way to get enough fat into our formula. As I mentioned before, we’re using coconut milk, which has an average fat content of 14 grams of per ⅓ cup, which is a good start, but it’s not good enough. To increase the fat content, we’re going to take three cans of coconut milk and reduce it to the weight of two cans, thus removing one third of the water content. By doing this, we increase the concentration of fat from 14 grams per ⅓ cup to 18.6 grams per ⅓ cup, which will get us that smooth texture and velvety mouth-feel.
Just in case you’re wondering “why not use coconut cream in place of coconut milk?” you’re definitely on to something. It’s true that coconut cream generally has more fat than coconut milk, but the amount differs largely from brand to brand. Coconut milk, on the other hand, is generally the same, give or take a gram, brand to brand. So, in order to ensure everyone gets consistent results, coconut milk is the better option here.

“Okay, so we’re done talking now right?” NOT SO FAST. We still have three more talking points to go – where you goin’ in such a hurry? The second thing we gotta talk about is sweeteners. While you’ll see ice creams made with all types of sweeteners – cane sugar, erythritol, corn syrup, etc – one of them reigns supreme: agave nectar. That’s because agave is thick & viscous, meaning it creates a full-bodied mouth-feel and thicker base than cane sugar, which thins out when liquified. Agave also happens to be 25% sweeter than cane sugar, which allows less to be used, therefore keeping a higher concentration of fat and allowing other flavors to shine through!
“Why agave over corn syrup?” Well, that all comes down to how they’re processed. Making agave goes a little like: extract sap from the heart of an agave plant, filter it, and heat it over low heat to convert its carbohydrates into sugars. Corn syrup, on the other hand, requires special enzymes to break down the carbohydrates from corn starch into glucose, which isn’t half as scary as you probably thought it was, but it’s certainly a little bit more involved than making agave syrup.

On the topic of freezing points, let’s talk about alcohol, which is another crucial ingredient here, because without it, you’d have to thaw your ice cream for about 20 minutes every time you wanted a bite. Alcohol has a much lower freezing point than water, so by adding it into our mix we effectively lower the freezing point of our ice cream, creating an ice cream that’s soft and scoop-able. But beware, add too much alcohol and you’ll reduce its creaminess or create an ice cream that never freezes. As you can tell, it took a few test trials to get the proportions right.
The last ingredient you may have a question about is xanthan gum, an unusual suspect for a homemade ice cream. Its purpose here is to keep the fat and water together in a state of suspended animation, as without it, the fat in the coconut milk may harden and separate to the top of the mixture; xanthan gum acts like a glue between the fat and water molecules. But it has another purpose here: xanthan gum makes our ice cream base thicker – it will be almost jelly-like when it comes out of the fridge – which will help trap air into the mixture as it churns. More air = better texture & flavor. Without the xanthan gum, the mixture won’t incorporate nearly as much air, thus remaining dense, flat, and lacking in flavor – trust me, I’m speaking from experience.

Alright, that covers all the bases of Ice Cream 101. Will there be an Ice Cream 102? You’re damn right there will be, and I can only hope I’ll figure out more efficient ways to make even better ice cream by then. But until that time comes, this ice cream is soft, creamy, and perfectly sweet with a flavor combination that takes like a Biscoff cookie dunked into a mocha latte.
“Hello Heaven, is that you?”
“Yes, yes it is.”
If you like what your tastebuds are tellin’ ya, leave behind a nice rating, share your thoughts with us in the comments, or show us your creations by tagging @noeggsorham on Instagram.
See You on Friday for Brunch?
Ryan

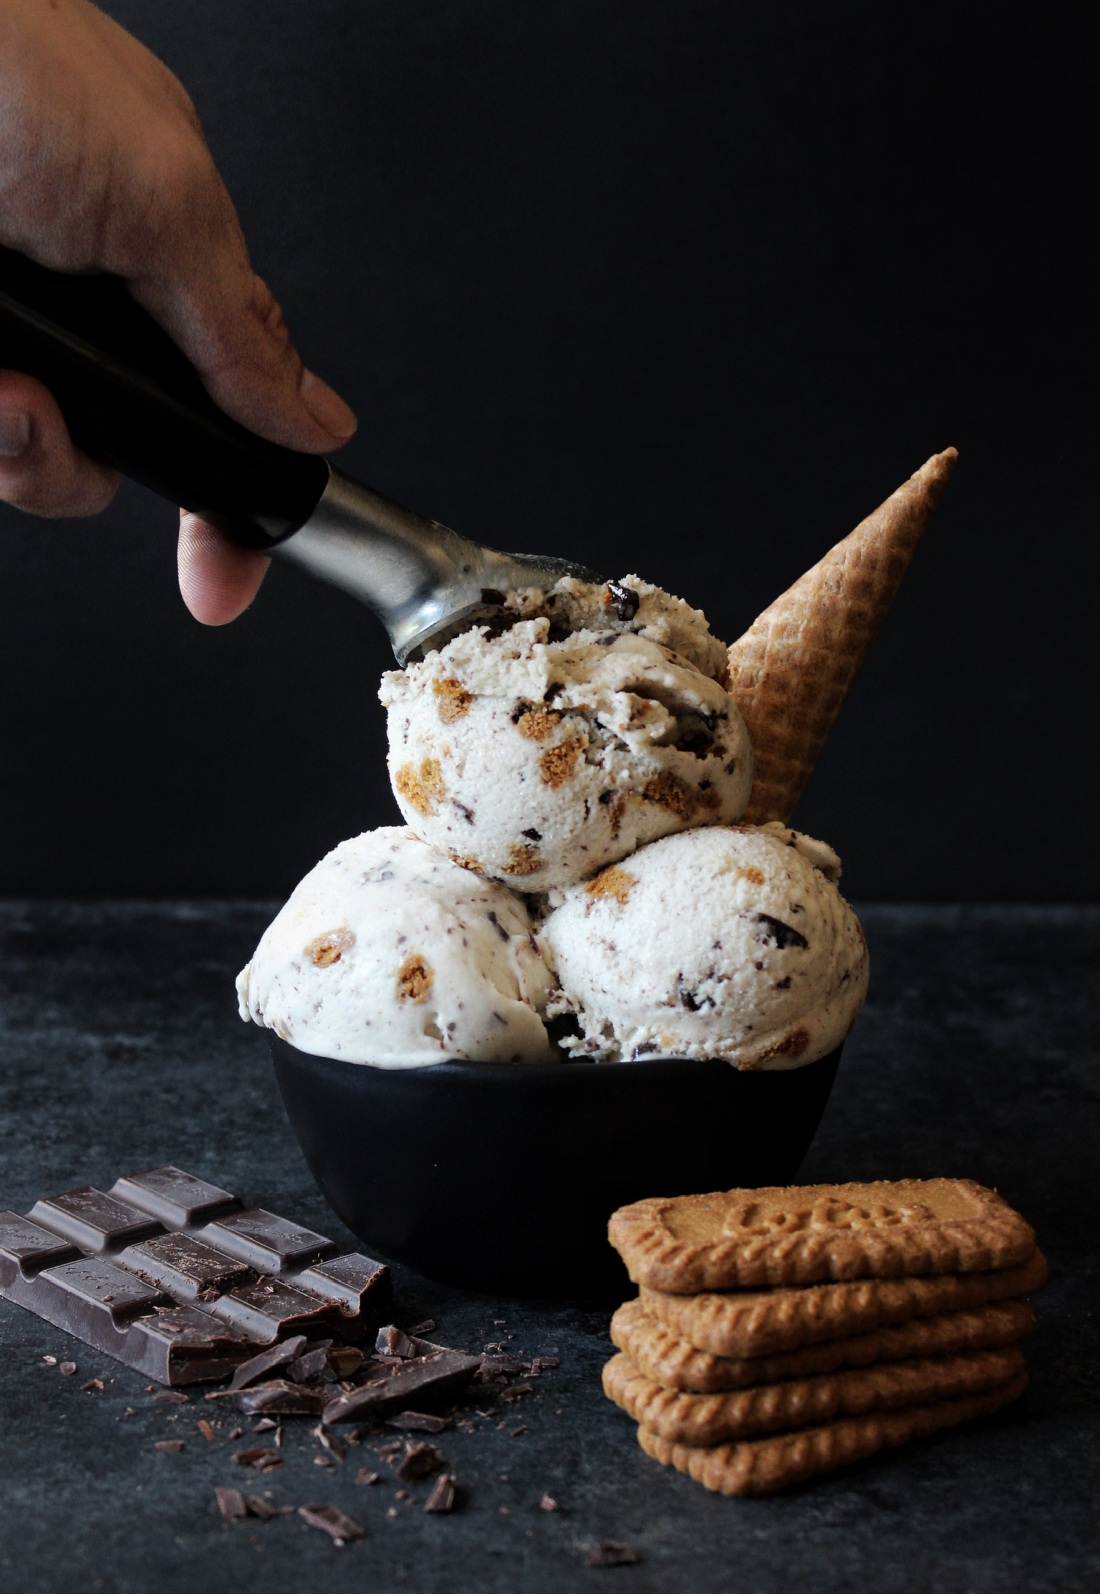
Coffee Liqueur Ice Cream with Chocolate Shavings and Biscoff Cookie Crumbles (vegan)
Smooth, rich, and full-bodied ice cream with crunchy & indulgent mix-ins.
Ingredients
- 3 13.5 oz cans full-fat coconut milk
- 254 g (3/4 c) agave nectar
- 3 oz coffee liquor (such as Kahlua or Dos Santos)
- 2 tsps vanilla extract
- 1/4 tsp xanthan gum
- small pinch of salt
- 2 oz semi-sweet chocolate (70% cacao), shaved
- 10 biscoff cookies, crushed into medium chunks
Directions
- Place your ice cream maker bowl and paddle in the freezer for at least 12 hours.
- Weigh a large pot on a scale, note its weight, then tare it out. Now pour the coconut milk into the pot, set it over high heat and bring to a boil, watching carefully, as the milk will bubble up.
- Once a boil’s achieved, reduce the heat to medium and keep at a heavy simmer, stirring occasionally, until the mixture’s reduced by a third; about 30 minutes.
- The final weight of the coconut milk should be 28.50 oz. You know you’re done when the total weight equals 28.50 oz plus the weight of your pot. Simmer it for about 20 minutes, then start placing it on the scale periodically to check its weight.
- While the coconut milk is simmering, combine agave, coffee liquor, vanilla, xanthan gum, and a small pinch of salt in a personal-sized blender. Blend until ingredients are incorporated and xanthan gum is completely dispersed.
- Once the coconut milk has finished reducing, turn off the heat and stir in the agave mixture. Allow to cool for 30 minutes, then pour through a fine mesh strainer into a pitcher or large container. Place a piece of plastic wrap right on top of the surface of the custard and place in the fridge overnight or for at least 8 hours.
- The next day, turn on your ice cream maker and pour in the custard, which will be very thick, as the ice cream maker is running. Churn until the mixture is fluffy and almost at soft serve consistency. This took us 1 hour, but that time can differ for every ice cream, so start checking the consistency after 30 minutes.
- While the ice cream churns, use a knife to shave down chocolate bar into thin pieces and flakes. Place biscoff cookies in a bag and lightly crush. To remove dust from the cookies, place them in a colander and gently shake, thus leaving you all chunks and no dust.
- When your ice cream has reached its final consistency, add in the chocolate & cookie pieces and churn until they’re just combined. Transfer ice cream to an airtight container and place in the freezer for at least 6 hours to harden before serving.
- Because of the alcohol content, the ice cream should be soft enough to scoop without thawing! Store in the freezer for up to two weeks.

How can I use the recipe for coconut butter turned coconut milk with this ? Thanks for the delicious recipes !
LikeLike
Hey Elysia!
Thanks for the inquiry. Honestly, I don’t think the coconut butter coconut milk is the best for this recipe, as the ice cream base has to be reduced and incredibly smooth. The coconut butter coconut milk remains the slightest bit grainy, which is fine for most applications, but I’m afraid those tiny coconut solids could make the ice cream every so slightly gritty.
However, if you’re feeling daring & want to experiment, try out 1 3/4 cup coconut butter blended with 1 3/4 cup of hot water, and skip the reduction step of this recipe.
If you try it out, let us know how it goes!
Best,
Ryan
LikeLike
I linked into this recipe looking at your recipe on making coconut butter into cream or milk …can I use the milk made from coconut butter in this recipe and if so how much ? Yum! BTW recipes look amazing
LikeLike
Oh my gosh this looks so freakin fantastic! Totally making this today 🌸🌸💖💖💖🙏🙏🙏 thanks for posting xx
LikeLiked by 1 person
Heck yeah! We’re stoked you dig it. Let us know how it turns out!
LikeLike